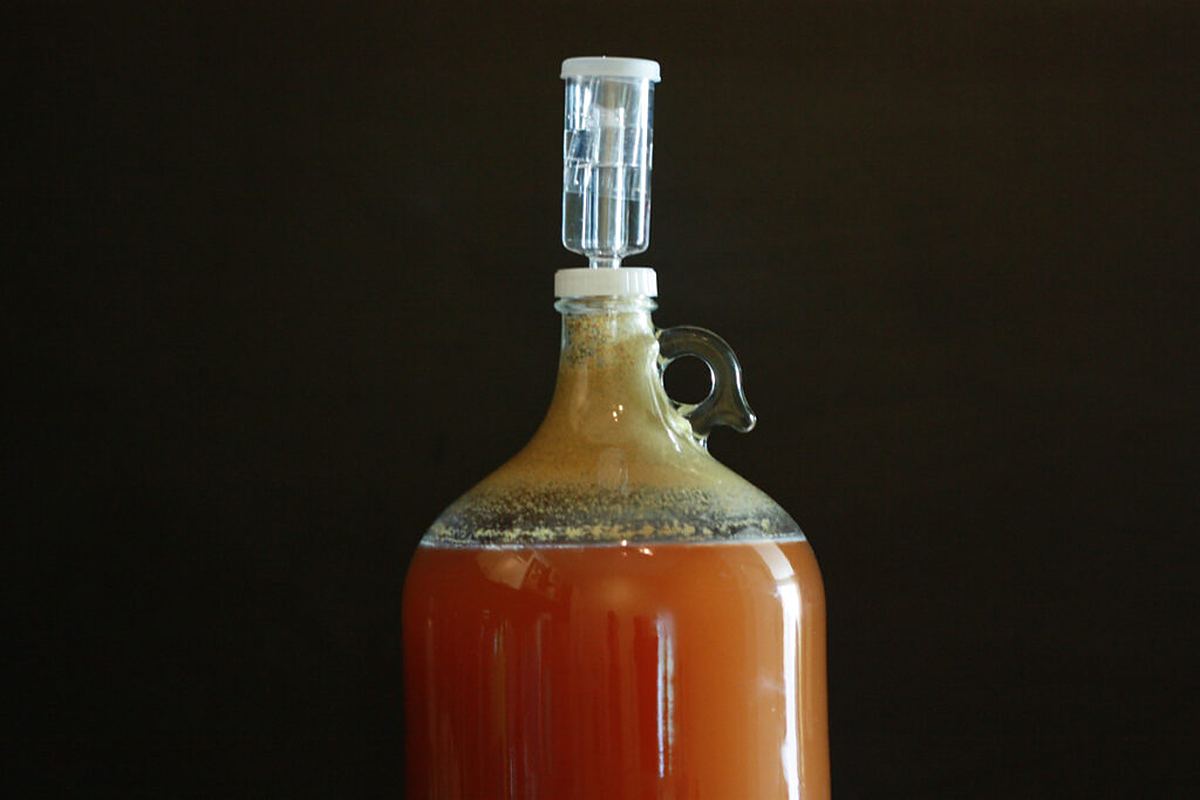
Yeast Washing & Ranching
Every finished ferment leaves behind a thick layer of yeast at the bottom of the vessel — billions of living cells, already proven on your wash, that most distillers simply throw away. With a little care you can clean that yeast up, store it, and use it again for batch after batch. Taken further, you can keep a whole library of strains alive for years. This guide covers washing, storing, re-pitching, and the longer-term art of yeast ranching — including capturing yeast from bottle dregs, isolating single colonies on agar plates, stepping a culture up to pitching size, and keeping a proper yeast bank.
Why reuse yeast at all
There are three good reasons to keep your yeast instead of buying fresh every time. The first is cost: a single pack of liquid yeast can cost as much as the rest of a batch's ingredients, and one harvest can supply several future batches. The second is consistency: yeast harvested from your own ferment is a known quantity — you know the strain, the generation, and the conditions it has already handled, so batch-to-batch variation drops. The third is availability: a strain you like may be seasonal, hard to find, or discontinued, and a home yeast bank means you never lose it.
There is also a performance argument. Yeast that has already completed a fermentation is acclimatised to your water, your nutrients, and your temperatures. Second- and third-generation pitches often start faster and ferment more vigorously than the original pack, because the population has already been selected for cells that thrive in your conditions. That advantage fades with further generations — but for the first few reuses, harvested yeast can outperform fresh.
What yeast washing is
When fermentation finishes, the sediment at the bottom of the vessel is not pure yeast. It is a mixture: living yeast cells, dead yeast cells, and trub — the debris of the ferment, including grain solids, hop material (in beer), and coagulated protein. Washing is the process of separating the healthy yeast from the rest of it, using the fact that the different components settle at different speeds in water.
Left to stand in a jar, the mixture stratifies into layers. The heavy trub drops first and forms a dark bottom band. Above it sits a creamy, pale layer — mostly healthy yeast. The liquid on top is spent wash or beer. The goal of washing is to keep that middle cream layer and leave the rest behind. It is sometimes called yeast rinsing, and the two terms are used interchangeably; purists reserve “washing” for treatments involving acid, which home distillers should not attempt.
It is worth saying plainly: washing is optional. Many brewers and distillers simply scoop the whole slurry into a sanitised jar and re-pitch it as-is, and for a quick turnaround that works fine. Washing earns its keep when the yeast will be stored for weeks, when the trub load is heavy (grain mashes, heavily hopped beers), or when you want a clean culture for longer-term storage.
Washing, step by step
- Prepare sterile water. Boil a litre or so of water for 15 minutes, then cool it to room temperature and keep it covered. Boiling both sterilises the water and drives off chlorine. Prepare it a day ahead and keep it in the fridge in a sanitised, sealed jar.
- Sanitise your jars. Boil several mason jars and their lids, or soak them in a no-rinse sanitiser. Everything that touches the yeast from here on must be clean and sanitised.
- Rack the wash off the yeast. Siphon or drain the finished wash off the sediment, leaving a little liquid behind to loosen the cake. Work promptly — yeast exposed to air picks up contaminants quickly.
- Swirl and transfer. Add some of the sterile water to the fermenter, swirl to break up the sediment, and pour the slurry into a large sanitised jar. Top up with more sterile water and shake well to break up clumps.
- Let it settle, then decant. Leave the jar in the fridge for about 20–30 minutes. The heavy trub settles to the bottom while the yeast stays suspended longer. Pour the cloudy liquid — the suspended yeast — into a second sanitised jar, leaving the dark trub layer behind. Repeat if the yeast layer still looks dirty.
- Settle and store. Leave the second jar in the fridge for a few days. The yeast will compact into a cream-coloured layer at the bottom. Pour off most of the clear liquid, leaving just enough to cover the yeast, and cap the jar. Label it with the strain, the generation number, and the date.
One safety note: leave lids slightly loose for the first day or two, or loosen them periodically. Residual fermentation can produce gas, and a sealed jar of active yeast can pressurise enough to spray — or burst — when opened. Once the yeast is cold and dormant, tighten the lid.
Storing washed yeast
Washed yeast keeps in the fridge at 1–4 °C (34–40 °F). As a practical matter, plan to use it within a month or two — viability declines steadily in storage, and older yeast needs a starter to prove it is still alive and to build up cell numbers before pitching. Some brewers have revived washed yeast a year old, but that is the exception, not the plan: the longer it sits, the more dead cells it contains, and dead cells contribute off-flavours and provide food for contaminants.
Never store yeast at room temperature for more than a day or two, and never feed stored yeast sugar. The goal of storage is dormancy: cold, quiet, and unfed. Adding sugar wakes the yeast up, starts fermentation in a sealed jar, and risks exactly the pressurisation problem described above.
Re-pitching: how much, and when
Harvested slurry is less predictable than a fresh laboratory culture, so pitch rates need a margin. Wyeast, one of the major liquid yeast producers, advises that pitch rates for harvested slurry should be 1.5–2 times the rate used for laboratory-grade culture, because harvested yeast has been stressed by fermentation and contains a share of dead cells. In practical terms, for a standard 5-gallon (19-litre) batch, most homebrewers pitch roughly 80–120 mL — about a third to a half cup — of settled, healthy cream-coloured slurry, or about a quarter to a third of the total slurry from the previous batch. Fresh slurry (under a week old) can be pitched directly; older slurry should go through a starter first, both to confirm viability and to rebuild cell numbers.
A few rules of thumb for choosing what to harvest from:
- Pitch from light to dark, and from low gravity to high gravity. Yeast from a pale, low-alcohol batch carries little colour or flavour into the next one; yeast from a dark, strong batch carries both.
- Do not harvest from very high-gravity ferments. Yeast that has worked through a high-alcohol wash is stressed and depleted, and it passes that stress on. High-gravity batches are for fresh yeast.
- Do not harvest from a batch that had problems. Off-flavours, sluggish fermentation, or any sign of infection in the parent batch will carry forward into the next one. Harvest only from clean, healthy ferments.
On brew day, take the jar out of the fridge an hour or two before pitching, loosen the lid to release any pressure, pour off the liquid on top, and swirl the yeast into a slurry before pitching — or build it into a starter first if it has been stored more than a week or two.
How many generations
There is no hard limit, but the broad consensus among homebrewers is about 5–6 generations of reuse before a culture should be replaced with fresh yeast. Some brewers push to 10, and commercial breweries with laboratory control repitch many more times than that — but each generation accumulates small changes. Mutations drift the strain's behaviour, the population gradually selects for cells that flocculate early or attenuate less, and each handling step adds another chance for contamination to creep in. The practical sign that a culture is done is performance: slow starts, incomplete fermentation, or flavour drift that was not there in earlier generations.
Keep a written record — strain, generation number, parent batch, and date — on every jar. Without it, you will not know whether the yeast in the fridge is generation two or generation nine, and that distinction is the difference between a reliable pitch and a gamble.
The cleanest method: overbuilt starters
There is a better way to harvest yeast that avoids trub entirely. When you make a yeast starter, deliberately build it larger than you need — overbuild by roughly a third — and pour off the extra into a sanitised jar before pitching the rest. The saved portion is pure, healthy yeast grown in clean wort, with no trub, no hop debris, and no alcohol stress. It has never seen a full fermentation, so it is effectively first-generation yeast, and it stores in the fridge just like washed slurry.
This is the method experienced brewers increasingly prefer, because it sidesteps the two main problems of washing — trub contamination and stressed yeast — at the cost of a slightly larger starter. If you already make starters, overbuilding adds almost no work. See the yeast starter guide for the process.
Harvesting yeast from bottle dregs
Your own fermenter is not the only source of yeast worth keeping. Any bottle-conditioned beer carries living yeast in the sediment at the bottom of the bottle — in many cases the very strain that fermented the beer. Harvesting it is the cheapest way to acquire a new strain, and the most satisfying: a single bottle can be the start of a culture that serves you for years.
The catch is that the yeast in the bottle is not always the yeast that made the beer. Some breweries filter out the fermenting strain and add a different one for conditioning — usually a hardy, neutral strain chosen because it settles firmly and survives the bottle. Others filter and force-carbonate, leaving no living yeast at all. Before you plan a harvest, find out what the brewery does: homebrewing forums usually know, and a brewery that conditions with its house strain is the prize.
A little research pays off. The author's own ranching habit began at a homebrew club bottle share, when a friend brought a bottle of Rochefort 8. He swirled the dregs into a flask of fresh wort, set it on a stir plate, and four days later had a growing culture — rough technique, no serious sterile precautions, and it still worked well enough to ferment a strong dark ale he was proud of. The lesson is not that sanitation doesn't matter — it does, and he does it properly now — but that bottle yeast is tougher than it looks: those cells had crossed an ocean and sat on a shelf before being asked to work again.
His next capture was more deliberate. He bought a bottle of Ommegang, noticed the sediment, and checked first: the brewery uses a single strain across all its beers and bottle-conditions with that same strain, so the dregs were a genuine sample of the house yeast. He grew up about 200 mL and banked half a dozen slants from it. He tells the full story — Rochefort, Ommegang, and the plate work that followed — in “Yeast Ranching”, cited in the sources below.
To harvest from a bottle yourself: chill the bottle upright so the sediment compacts, pour off most of the beer gently, then swirl the last centimetre and pour it into a small starter of fresh wort (see the yeast starter guide). Keep the first step small — 100–200 mL — and step it up once it shows signs of life. Smell it before you commit: healthy yeast smells bready and clean. If it smells sour or phenolic, the bottle's culture is not what you hoped, and it is cheaper to start over than to rescue it.
For distillers, the same approach works for capturing beer yeasts, but think about what the strain will face in a wash: high gravity, higher temperatures, and no hops. A Belgian ale strain captured from a bottle will ferment a wash happily, but check its alcohol tolerance against the wash you plan — the strain's limits matter more than its origin story.
Streaking plates and single-colony isolation
Washing gives you a population; streaking gives you a single cell. When you want a culture you can trust completely — one isolated from a bottle, one rescued from a suspect jar, or one you plan to bank for years — the technique is to spread the yeast thinly across an agar plate so that individual cells land far apart and each grows into its own visible colony. Pick one colony and you have a pure culture, descended from a single cell.
Start with sterile equipment. Glassware — flasks, test tubes, petri dishes — spends 15 minutes in a pressure cooker. The growth medium is boiled for about 10 minutes, agar is stirred in, and the mixture is poured into the dishes with sterile pipettes, then left in the fridge to set firm. Work on a surface wiped down with alcohol, and keep a flame burning nearby: the rising hot air carries dust and airborne microbes upward, away from your open plates. An alcohol lamp does the job; a gas stove burner works too.
The tool is an inoculation loop — a thin nichrome wire with a small loop at the end. Flame it until it glows, let it cool for a few seconds by touching it lightly to the agar, then flame the mouth of the tube holding your culture and dip the loop in to pick up a single drop. Draw the loop across the plate in a zig-zag, so that the deposit thins out as you go and lone cells are left spaced far apart toward the end of the streak. The goal is a gradient: dense growth where you started, and single cells at the far end.
Leave the plates at room temperature for about three days. Colonies appear along the streak lines — small, round, cream-coloured dots. What you are watching for is anything that does not belong: fuzzy mould, shiny or coloured colonies, or growth in shapes unlike the yeast. A clean plate shows only yeast colonies, and it will stay clean in the fridge for weeks. The author's first attempt at this — isolating the Vermont ale strain known as Conan from a shared sample — produced plates with no contamination at all, which says more about careful technique than about luck: flame, still air, and patience.
Pick an isolated colony with a freshly flamed loop — one that stands alone, not touching its neighbours — and transfer it to a slant or into a small volume of sterile wort. That single colony is now your pure culture, and everything you grow from it descends from one cell.
Stepping up a propagation
A single colony is pure, but it is far too small to ferment a batch. The next stage is stepping up: growing the culture through a series of larger volumes, each one roughly ten times the last, until you reach a pitching quantity. Each step gives the yeast fresh food and room to multiply, and the step size matters — too big a jump and a handful of cells struggles in a large volume of wort; too small and you waste days.
A proven progression, from a single colony to a full pitch, looks like this:
- 1 mL of sterile wort in a test tube, at room temperature for about 2 days. The colony grows into a visibly cloudy culture.
- 10 mL in a larger tube, another 2 days. By now the culture is clearly active.
- 250 mL in a flask on a stir plate, a day or two. The stir plate keeps the yeast in suspension and well oxygenated, which speeds growth.
- 500 mL for about 3 days, then into a full starter as described in the yeast starter guide.
From colony to pitchable culture takes roughly a week. The target for a standard 5-gallon (19-litre) batch is on the order of 100 billion cells — the same quantity a single liquid yeast pack contains — and the step-up above, ending in a full starter, gets you into that range. For exact numbers, the yeast pitching calculator works out how many cells your wash needs from its volume and gravity, so you can check whether your stepped-up culture is enough or needs one more step.
Sanitation matters more at every step, because each step multiplies whatever is in the culture — including any contaminant. If you start with twenty cells and one of them is a bacterium, that bacterium gets multiplied a billion-fold along with the yeast. This is why the colony you pick must be isolated, why every transfer is flamed, and why a stepped-up culture that smells wrong should be discarded rather than pitched. If the strain is new to you, test it on a small batch first: a one-gallon trial ferment tells you what the yeast actually does before you trust it with a full wash.
For distillers, the same progression applies to propagating a distiller's yeast or a captured strain for a wash — the volumes scale to the batch, and the pitching calculator's cell targets are the check. Distilling washes are often larger and higher-gravity than beer batches, so plan the final starter step generously.
Slants: a yeast bank in a test tube
For storage measured in months rather than weeks, the classic technique is the agar slant. A small test tube is filled with a nutrient agar medium — typically malt extract and agar — sterilised, and allowed to set while tilted, so the agar forms a long sloped surface. A tiny amount of yeast is streaked across the slope with a sterilised inoculation loop, the tube is incubated for a day or two until colonies grow, and then it is capped and refrigerated.
A slant kept in the fridge stays viable for roughly 6–12 months. Before it expires, a fresh slant is made from it — re-slanting — which restarts the clock. Each re-slanting is another passage of the culture, so the generation count creeps up over the years, but with careful technique a single purchased vial can supply a home brewer for many years: at 6–12 months per slant, even a conservative limit of 15 passages represents 7–15 years of use. Slants take little space — a dozen strains fit in a small box in the fridge — which is why they are the standard for home yeast banks.
Slanting demands stricter technique than washing. The agar must be sterilised (a pressure cooker works), transfers should be done near a flame or in still air to limit airborne contamination, and everything that touches the culture must be sterile, not merely sanitised. It is the most advanced technique in this guide, and it rewards patience.
Freezing with glycerol
For genuinely long-term storage, yeast can be frozen in a glycerol solution. Glycerol acts as a cryoprotectant: it prevents the ice crystals that would otherwise rupture yeast cells as the sample freezes. The standard approach is to mix thick yeast slurry with glycerol to a final concentration of about 15–25% glycerol, divide it into small vials or centrifuge tubes, and freeze them. Professional yeast banks freeze cultures in 15% glycerol at −80 °C or colder, where yeast remains viable for decades; a home freezer at −18 °C or so is far less ideal, but frozen glycerol stocks still keep far longer than refrigerated slurry — a year or two is a reasonable expectation.
One home-freezer pitfall is the defrost cycle. Frost-free freezers periodically warm up to shed ice, and those temperature swings damage frozen yeast. If your freezer is frost-free, pack the vials inside an insulated container with freezer packs to buffer the cycles, or use a manual-defrost chest freezer if you have one. To use a frozen stock, thaw it gently in the fridge, then build it up through a starter — never pitch a thawed vial directly into a full batch.
Building and maintaining a yeast bank
Slants and frozen vials are storage methods; a yeast bank is a system. The difference is organisation: knowing what you have, where it is, how old it is, and when it needs attention. Without that, a fridge full of unlabelled tubes is not a bank — it is a mystery box.
Start with a simple inventory. Every slant, plate, and frozen vial gets a label: strain name, source (where the culture came from — a pack, a bottle, a swap), the date it was banked, and a generation or passage number. Keep the same information in a notebook or a spreadsheet, with a notes column for anything you learn about the strain — how it ferments, what it likes, what went wrong. The record matters more than the storage method, because a culture you cannot identify is a culture you cannot trust.
Build in redundancy. Bank each strain in at least two forms — a slant for regular use and a frozen vial as a backup — and in duplicate where you can: two slants of the same strain, stored apart, so a single dropped tube or a failed fridge does not wipe out a strain. Slants need re-slanting every 6–12 months; frozen stocks last far longer but should still be checked and refreshed on a schedule — once a year is a sensible rhythm for a home bank.
Set a rotation schedule and keep it. A simple one: every six months, take each slant out, check that it looks and smells healthy, and re-slant the ones approaching their limit. Once a year, thaw one vial of each frozen strain into a starter to confirm it is still alive, and re-freeze a fresh stock from it. Write the dates down when you do it — the schedule only works if the record is honest.
Think of the bank in layers. The working layer is washed slurry and overbuilt starters for the next few batches. The medium layer is slants, good for months, cheap and quick to revive. The deep layer is frozen glycerol stocks, your insurance against losing a strain entirely. A culture flows downward through the layers: a new strain arrives as a bottle capture or a pack, gets purified on a plate, stepped up, pitched — and the best of it gets banked as a slant and a frozen vial before it is ever used in anger.
For distillers, a bank is worth building around wash strains: a reliable distiller's yeast, a high-temperature-tolerant strain for warm ferments, a rum or whiskey yeast with the character you like, and any beer strain whose flavour you want in a wash. Keep the beer strains too — the same bank serves both hobbies, and a strain captured from a bottle of Belgian ale may turn out to be the best thing that ever happened to your corn wash.
Contamination risks — and when to throw it out
Every time yeast is handled, wild yeast and bacteria get an opportunity. Lactobacillus and Pediococcus produce sourness; wild Brettanomyces produces barnyard and phenolic flavours; acetobacter turns alcohol into vinegar. These organisms grow slowly in the fridge, but they grow — which is one more reason stored yeast has a shelf life, and why harvesting from a clean ferment matters more than any washing step.
Discard a stored culture if the jar smells sour, vinegary, or sharply phenolic when opened; if the yeast layer looks pink, orange, or black rather than cream; if the liquid on top is ropey or slimy; or if a starter built from it smells wrong or refuses to take off. Trust your nose: healthy yeast smells bready and mildly yeasty, and anything else is a warning. And never harvest from a ferment that showed any sign of infection — washing cannot reliably separate your yeast from an established contaminant.
Sources
- BeerCraftr, “Yeast Washing: How to reuse brewing yeast to save money” — washing procedure (sterile water, settling, decanting); fridge storage of a month or two; consensus of 5–6 generations, some to 10. beercraftr.com
- Wyeast Laboratories, pitching-rate guidance (quoted in BeerAdvocate discussion) — pitch rates for harvested slurry should be 1.5–2 times the rate for laboratory-grade culture. beeradvocate.com
- Homebrew Talk, “Yeast Banking Question” — slants last 6–12 months in the fridge and must be re-slanted; professional banks freeze yeast in 15% glycerol at −80 °C to −150 °C. homebrewtalk.com
- Homebrew Talk, “Stretch out your yeast dollar?” — washed yeast usable for about 6 months; consensus of 6–7 washes before replacing; slant construction and use. homebrewtalk.com
- Homebrew Talk, “yeast harvesting” — practical slurry volumes (a quarter to a third of the previous batch's slurry for a 5-gallon batch); overbuilt starters as the preferred harvest method; glycerol freezing in test tubes. homebrewtalk.com
- Craft Beer Brewing Kit, “From Cake to Carboy: Harvesting and Repitching Yeast Slurry” — cream-layer cell density of 1.0–2.5 billion viable cells per mL; 80–120 mL of settled slurry for a standard 5-gallon batch; do not harvest above 1.070 gravity. craftbeerbrewingkit.com
- BeerAdvocate, “How to preserve a healthy yeast strain for a long time” — rule of thumb of about 5 generations before replacing yeast; slanting from the original package to preserve a clean culture. beeradvocate.com
- The Economic Alcoholic, “Yeast Ranching” (May 2014) — the Rochefort 8 and Ommegang bottle captures; plate-streaking method (pressure-cooker sterilisation, flamed loop, flame updraft); the 1 mL → 10 mL → 250 mL → 500 mL step-up progression toward 100 billion cells.
- Chris White and Jamil Zainasheff, Yeast: The Practical Guide to Beer Fermentation (Brewers Publications, 2010) — plate streaking and single-colony isolation, step-up propagation, and pitch-rate principles.
- Wyeast Laboratories — a single liquid yeast pack contains approximately 100 billion cells, the standard pitch for a 5-gallon batch. wyeastlab.com