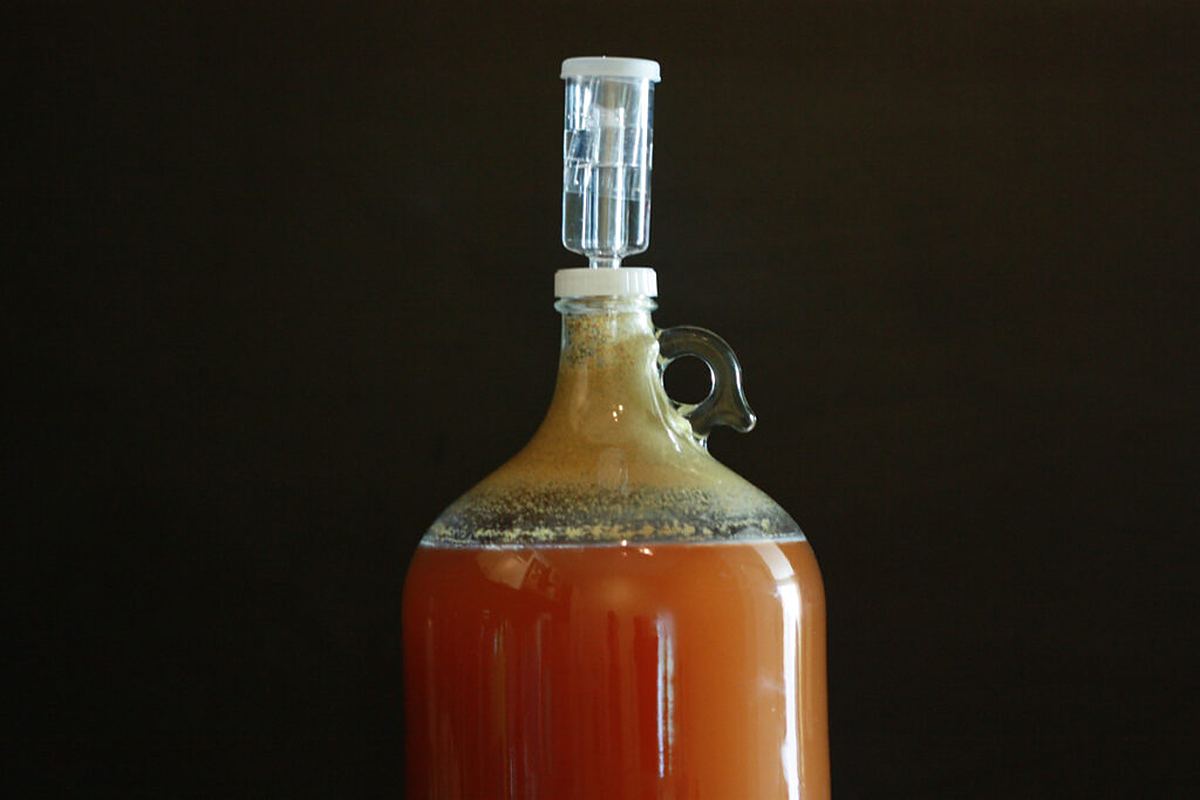
Fermentation Temperature Control
Of everything you can do for a wash before it ever reaches the still, controlling its temperature is the single most rewarding. Yeast is a living organism with firm opinions about warmth: keep it in its comfort zone and it works cleanly and completely; let it roast or chill and it produces off-flavours, stalls, or dies. This intermediate guide explains why temperature matters, what range each yeast type wants, and the practical setups — from a simple heat belt to a converted chest freezer — that hold a ferment steady through every season.
Why temperature matters
Temperature governs nearly everything yeast does. Within its preferred range, yeast converts sugar to ethanol efficiently and produces a modest, predictable set of flavour compounds. Push it hotter and the yeast works faster — but it also becomes stressed, and stressed yeast produces more fusel alcohols and esters: the hot, solvent-like, headache-prone compounds that survive distillation and roughen the finished spirit. Fermenting at the low end of a strain's range gives a cleaner, more neutral result; fermenting at the high end gives more esters and fusels; exceeding the maximum stresses the yeast and produces off-flavours outright.
Cold is the opposite failure. As the wash cools below the yeast's range, activity slows, then nearly stops. The classic pattern is a wash pitched warm in the evening that chills overnight in a cold room or garage: the yeast drops out of suspension early, the gravity stops falling while sugar remains, and you have a stuck fermentation. Many stalls are temperature problems wearing a disguise, and the fix is often as simple as warming the fermenter back into range.
There is a further wrinkle: fermentation generates its own heat. It is an exothermic reaction, and the liquid inside an active fermenter can run as much as 10 °F (about 5–6 °C) warmer than the surrounding air. A room that feels a comfortable 20 °C can hold a fermenter running at 25 °C or more during peak activity. That is why the temperature that matters is the temperature of the liquid, not the room — and why a ferment that starts in range can drift out of it on its own during the most vigorous days.
Ideal ranges by yeast type
Every strain has its own stated range, and the packet or the manufacturer's data sheet is always the final authority. But the broad bands below are a reliable starting point for choosing and planning a ferment:
| Yeast type | Typical fermentation range | Notes |
|---|---|---|
| Ale yeast (Saccharomyces cerevisiae) | 16–24 °C (60–75 °F) | Cleanest at the low end; fruitier and more estery toward the top |
| Lager yeast (Saccharomyces pastorianus) | 7–13 °C (45–55 °F) | Needs real cooling in most homes; slow but very clean |
| Wine yeast | 16–27 °C (60–80 °F) | Broad tolerance; whites often fermented cooler to preserve aroma |
| Distiller's yeast (e.g. Red Star DADY) | 21–32 °C (70–90 °F) | Bred for high attenuation and alcohol tolerance in mashes and sugar washes |
| Turbo yeast | 20–32 °C (68–90 °F) | Fast and heat-tolerant, but the speed comes with more fusels and off-flavours |
Two thresholds are worth knowing whatever strain you use. Most distiller's yeast strains begin to die at around 35–40 °C (95–105 °F), with specialised heat-tolerant varieties surviving a little higher — so a wash left in a hot garage in summer can genuinely kill its yeast. At the other end, activity falls away sharply as the wash drops toward 12 °C, and a ferment held that cold for long will usually stall. The practical lesson is to aim for the middle of your strain's range, not the edges: the middle leaves room for the exothermic rise during peak fermentation and for a cold night without either pushing the yeast into trouble.
Warming a ferment: belts, pads, and water baths
For most home distillers the problem is cold, not heat — a basement, garage, or spare room that sits a few degrees below the yeast's comfort zone. Three low-cost heating methods cover nearly every situation.
Heat belts
A brew belt is a flexible band with a heating element inside that wraps around the fermenter and is pulled snug. Most use only 25–40 W, and a typical belt raises the fermenter's temperature roughly 5–10 °C above ambient. The belt's position gives a crude form of control: lower on the vessel means more heat reaches the liquid, higher means less. The limitation is that most belts have no thermostat — they run at a fixed output whenever they are plugged in — so they can overheat a ferment if the room warms up. Pairing a belt with an external temperature controller, or at least checking the liquid temperature daily, turns a blunt instrument into a reliable one.
Heat pads
A heat pad sits underneath the fermenter and warms it from below. Most pads run at around 30–40 W and, like belts, usually have no built-in thermostat. They are simple and effective, but they share the belt's weakness: without a controller, the temperature depends on the room. A pad also concentrates heat at the base of the fermenter, so it is worth checking that the yeast is not being cooked against the bottom — if the ferment smells stressed or the bottom of the vessel feels hot to the touch, the pad needs a controller or a timer to cycle it.
Aquarium heaters in a water bath
The most even heating method at this price point is a water bath: set the fermenter inside a larger tub or cooler filled with water, and put a submersible aquarium heater in the bath. Water transfers heat far more evenly than air, so the fermenter sits at the bath temperature throughout, with no hot spots. A 75–100 W aquarium heater is a common choice for a 25 L fermenter in a bath, and many aquarium heaters have their own built-in thermostat, though their dials are not always accurate at the low end of the scale — an external controller gives tighter control. Two cautions: the heater goes in the bath water, never inside the fermenter itself, where its hot surface would scorch the yeast it touches; and the water level must stay below the point where the fermenter starts to float, or the vessel can tip.
Insulation and brew jackets
Before adding heat, it is worth keeping the heat you already have. A fermenter wrapped in a moving blanket, a sleeping bag, or a purpose-made neoprene brew jacket loses heat far more slowly, which smooths out overnight dips and lets a small heater do much more work. Insulation also helps in the other direction: in summer it slows the rate at which a cool fermenter warms up. The cheapest effective insulation is a couple of layers of bubble wrap or an old blanket held on with bungee cords — unglamorous, but it works. One rule: never cover a heat belt or heat pad with insulation or a blanket. Heating elements need to shed heat freely, and wrapping one can overheat it and damage the fermenter or start a fire.
Keezers and fermentation chambers
When a belt or a bath is not enough — for lager yeasts that want 7–13 °C, for summer ferments in a hot climate, or for anyone who wants set-and-forget control — the standard homebrew answer is a converted fridge or chest freezer driven by an external temperature controller.
A chest freezer converted this way is often called a keezer (a keg freezer), though the same build serves perfectly well as a fermentation chamber. The freezer's own thermostat cannot hold fermentation temperatures — it is designed to freeze — so the trick is to plug the freezer into an external controller and let the controller switch the freezer's power on and off. The controller's temperature probe goes inside the chamber, and the set point is whatever the yeast wants. No modification to the freezer is needed in most cases: the probe lead is thin enough to pass through the lid seal.
The workhorse controller for this job is a dual-stage digital unit such as the Inkbird ITC-308, which has separate outlets for cooling and heating: the freezer plugs into the cooling outlet and a heat source — a belt, pad, or small heater — into the heating outlet, so the same box holds the temperature from both directions. A good controller also provides a compressor delay, typically several minutes, which protects the freezer's compressor from rapid on-off cycling. Probe placement matters: tape the probe to the side of the fermenter and insulate it from the chamber air with a piece of foam or bubble wrap, so the controller reads the liquid temperature rather than the air temperature. A thermowell — a sealed tube reaching into the liquid — is the most accurate option of all.
A dedicated fermentation chamber is the same idea built from scratch: an insulated box, often plywood lined with rigid foam, with a small fridge, a Peltier unit, or even a window air conditioner providing the cooling and a light bulb or heat pad providing the warmth, all switched by the same kind of controller. It takes more building, but it can be sized exactly to your fermenters and tucked into a space where a chest freezer would not fit.
Seasonal strategies: hot summers, cold winters
Temperature control is a year-round job, but the challenge flips with the seasons.
Summer: cooling without a chamber
Without a fridge or freezer, the classic summer method is the swamp cooler: the fermenter sits in a tub of water, and the temperature is pulled down by rotating frozen water bottles through the bath — two in the bath, two in the freezer, swapped every 12 hours or so. The bath water acts as a heat sink that also prevents the ferment's own exothermic rise from running away. A wet towel draped over the fermenter with its ends in the water, plus a fan blowing across it, adds evaporative cooling on top; on its own, a swamp cooler without ice typically holds the fermenter a few degrees below the surrounding air. These methods can hold ale and distiller's yeasts in range through a warm summer, but they struggle to reach true lager temperatures — that is a job for a chamber.
Summer is also the season to choose the yeast for the weather rather than fighting it. Heat-tolerant strains — Belgian ale yeasts, rum yeasts, and the high-temperature distiller's strains — are comfortable at temperatures that would stress a lager yeast, and a wash fermented at 28 °C with a strain that likes it will always taste cleaner than one fermented at 28 °C with a strain that does not. And pitch on the cool side of the range when you can: the ferment will warm itself as it gets going.
Winter: holding warmth
Winter's risk is the overnight stall. A fermenter in an unheated garage can drop several degrees overnight, and yeast that drops out of suspension does not always wake up when the room warms in the morning. The defences stack: move the fermenter to the warmest room you can, insulate it, and add a belt, pad, or water bath on a controller so the temperature never falls below the bottom of the range. If you are fermenting in a genuinely cold space — below about 10 °C — a fermentation chamber with a heater inside is the reliable answer, since a belt alone may not keep up. And remember that the first few days are the critical ones: once the most vigorous fermentation is past and the yeast has done the bulk of its work, a few degrees of drift matters far less.
Measuring the right temperature
Every method above depends on knowing how warm the wash itself is, rather than the room around it. A stick-on liquid-crystal thermometer on the outside of the fermenter is the cheapest option and is accurate enough for most purposes, though it reads the vessel wall rather than the liquid itself. A probe thermometer taped to the fermenter wall and insulated from the air reads closer to the true liquid temperature. For the most accurate reading, a thermowell puts the probe directly in the wash. Whatever you use, check it during the first 48 hours of the ferment, when the exothermic rise is strongest — that is when a ferment is most likely to overshoot its range unnoticed.
Sources
- HomeBrew Answers, “Fermentation Temperature — How To Control Temperature & Why It's Important” — typical ranges: ale 60–75 °F (16–24 °C), lager 45–55 °F (7–13 °C), wine 60–80 °F (16–27 °C); fermentation is exothermic and the fermenter can run up to 10 °F above ambient. homebrewanswers.com
- HomeBrew Answers, “Fermenter Heaters: Home Brew Heat Pads & Brew Belts” — heat pads around 30–40 W; brew belts typically 25–40 W; belt position (lower for more heat, higher for less) and the need for a controller or timer since most have no thermostat. homebrewanswers.com
- WineKitz Toronto, “Brew Belt Fermentation Heater” — approx. 25 W, raises temperature 5–10 °C above ambient, fits 19–23 L carboys. winekitztoronto.ca
- Still Brewin', “Yeast Guide” — fermenting at the low end of a strain's range gives cleaner flavours, at the high end more esters and fusel alcohols, above the maximum stresses the yeast; Red Star DADY 70–90 °F (21–32 °C), distiller's yeasts tolerate 14–18% ABV. stillbrewin.com
- Good Ol' Moonshine, “What Temperature Kills Distiller's Yeast?” — distiller's yeast typically dies at 95–105 °F (35–40 °C); ideal 75–85 °F (24–29 °C); turbo yeast 68–90 °F (20–32 °C); ambient should be 5–7 °F cooler than the target ferment temperature. goodolmoonshine.com
- Homebrew Talk, “Brew belt or heat pad?” — aquarium heater in a water bath with the fermenter; 75 W and 100 W heaters reported working well; seedling mat and insulation use. homebrewtalk.com
- Homebrew Talk, “Possible Temperature Control Method?” — aquarium heater belongs in the bath water, not inside the fermenter; the bath evens out temperature. homebrewtalk.com
- Homebrew Talk, “Controlling Fermentation During the summer” — swamp cooler with frozen water bottles; a chest freezer with an external controller spans lager to ale temperatures; swamp coolers cannot reliably reach lager temperatures. homebrewtalk.com
- Homebrew Talk, “Methods of Temperature Control For Fermentation” — swamp cooler holds roughly 3 °F below ambient by evaporation alone; water bath acts as a heat sink against runaway fermentation temperatures. homebrewtalk.com
- Homebrew Finds, “Inkbird ITC-308” — dual-stage plug-and-play controller with separate heating and cooling outlets, compressor delay protection, and probe taped to the fermenter and insulated (or in a thermowell). homebrewfinds.com
- Homebrew Talk, “Terminology overload: keezer, ferm chamber, etc.” — a chest freezer plus an external controller works as a fermentation chamber with no modification; a keezer is a keg freezer built the same way. homebrewtalk.com
- Samovar Tool, “Safety Rules for Distillation and Rectification” — electrical connections should use protective earth, a circuit breaker, and a residual-current device, and be left to a qualified electrician where in doubt. samovar-tool.ru
- OnBuy / Hopsbrew heat pad listing — heat pads are waterproof-surfaced but must not be immersed in liquid; do not use a pad with a damaged surface; risk of fire or electric shock if misused. onbuy.com